


 She was so tickled with herself and her newest trick!
Tuesday, August 31, 2010
baby giggles
Shortly after we put Addie to bed last night we heard baby giggles coming from her room. I peaked in the door to find this.
 She was so tickled with herself and her newest trick!
She was so tickled with herself and her newest trick!
Monday, August 30, 2010
first day of school, 2010-2011
We survived the first day of school! barely, but we survived. Right now it is mandatory quiet time for all the kids, 2 are sleeping, one crafting and the other two playing Legos.
We debated back and forth all summer weather or not to send Tallulah back for another year of preschool, especially since she will be doing CC with the rest of the kids and that would mean going out 4 days a week. In the end we decided to send her back and today was conformation that we made the right choice. You see, Preschool does not start for another week, so she was hear with us this morning while I tried to juggle school work for the other 3 kids. Remember that crazy Tasmanian Devil from Looney Tunes? I think Tallulah must be a direct descendant of his. Case in point, this (more or less) is what our "schoolroom" looked like before we started school this morning.

And this is it after

 Such joyful students I have :)
 Well, I guess you can imagine what I am doing with the rest of my day! If I can dig myself out of this mess hopefully I will be back with more posts this week, wish me luck!
Friday, August 27, 2010
sewing class
We finished our last sewing class today and I am so proud of the girls, they did such a great job and I will miss having them all here each week!
Our first class was a 4 week hand sewing class where we made a softie owl and embroidered a t-shirt. I wish I had take pictures of all their projects, but I just plain forget! Anyway, here are my example projects so you get the idea.

We took the month of July off and came back in August for 4 weeks of machine sewing. I had a total of 5 students ages 7-11. We started off with machine basics (how to thread the machine, fill your bobbin, straight stitch, back stitch etc.) then we moved on to our first project, a tote bag. In this project they learned how to make a french seam, how to sew and turn handles, and how to make boxed corners.

I made the initial appliques before hand and stitched them onto the fabric for them to go back and hand embroider (around the circle) later.

And our final project was a pillow cover. I pre-cut the squares because that would have taken a whole other 4 weeks I think with 5 girls trying to choose and cut their own but they sewed them all together today and did such an awesome job!


 I think they are all very proud of all their hard work- I know I am!
Thursday, August 26, 2010
proof of miricles and a finished sewing project
I finished up Regan's bean bag chair (the sewing project I referred to yesterday) last night before heading to bed. I am really happy with the results, and I think Regan is too, even though (heaven forbid) there are some pink dots on it .

I used this tutorial (adult size), only we used a little more than two, 100 liter bags of pellets. I bought three bags and plan to use the rest in a child sized chair, one of these days :)

And here is the documented miracle... Regan's room is CLEAN!
 I had to take pictures because I knew it would not last and chances are it will never look this good again, but I least I have these pictures to remind me how nice it can look.
 Back to cleaning- tomorrow is our last sewing class and I will try and remember to take some pictures to post of the girls and their awesome sewing! TTFN!

I used this tutorial (adult size), only we used a little more than two, 100 liter bags of pellets. I bought three bags and plan to use the rest in a child sized chair, one of these days :)
And here is the documented miracle... Regan's room is CLEAN!
 I had to take pictures because I knew it would not last and chances are it will never look this good again, but I least I have these pictures to remind me how nice it can look.
 Back to cleaning- tomorrow is our last sewing class and I will try and remember to take some pictures to post of the girls and their awesome sewing! TTFN!
Wednesday, August 25, 2010
savoring every last moment
One lazy summer afternoon + some new perler bead supplies= many hours of beading fun and some cool new designs on our BIG perler boards!
 This is just a sampling of the very best ones that were made in the last 3 days- there have been many more. Hours of endless fun and mommy not getting very much done b/c I've been beading too :)
I've got more to post about, but I'm a bit crazed right now (since I spent the last 3 hours helping make the dragon and farm, plus cook lunch and entertain a crawling baby and 2 neighbor kids)! If I can finish the sewing project I started last night and get the house cleaned I should be back with another post tomorrow. Wish me luck!
Saturday, August 21, 2010
new room in an afternoon
The boys finally got their makeover today! It is amazing how transforming one coat of paint can be. The room went from this, to this all in the hours between lunch and dinner!
 I've been promising for 8 months now to paint over those flowers and when we had almost a full gallon of both green and blue paint left after re-painting Regan's stripes (I guess I overestimated how much paint it would take to cover the pink!) we figured now was the time!
We also did a little rearranging that gives the boys a little more room to move around, since their room does double as the play room too.

I got their new covers on clearance at Target last week (when I got Regan's).
 Can you tell they are excited about their new room? These boys rarely smile for photos!

Courtney, there is one of the pink headboards from Regan's (old) room. I plan to paint it green as soon as I get a chance- it is acting as a back to a wire shelf in the "laundry/pantry" area of the room.
 I want to say that we are done with painting for awhile, but the truth is, I am itching to do board and batten and paint the kitchen- got my colors picked out and everything- currently I think the paint budget is empty though, so we just might get a break after all!
 I've been promising for 8 months now to paint over those flowers and when we had almost a full gallon of both green and blue paint left after re-painting Regan's stripes (I guess I overestimated how much paint it would take to cover the pink!) we figured now was the time!
We also did a little rearranging that gives the boys a little more room to move around, since their room does double as the play room too.

I got their new covers on clearance at Target last week (when I got Regan's).
 Can you tell they are excited about their new room? These boys rarely smile for photos!
Courtney, there is one of the pink headboards from Regan's (old) room. I plan to paint it green as soon as I get a chance- it is acting as a back to a wire shelf in the "laundry/pantry" area of the room.
 I want to say that we are done with painting for awhile, but the truth is, I am itching to do board and batten and paint the kitchen- got my colors picked out and everything- currently I think the paint budget is empty though, so we just might get a break after all!
Tuesday, August 17, 2010
i give up!
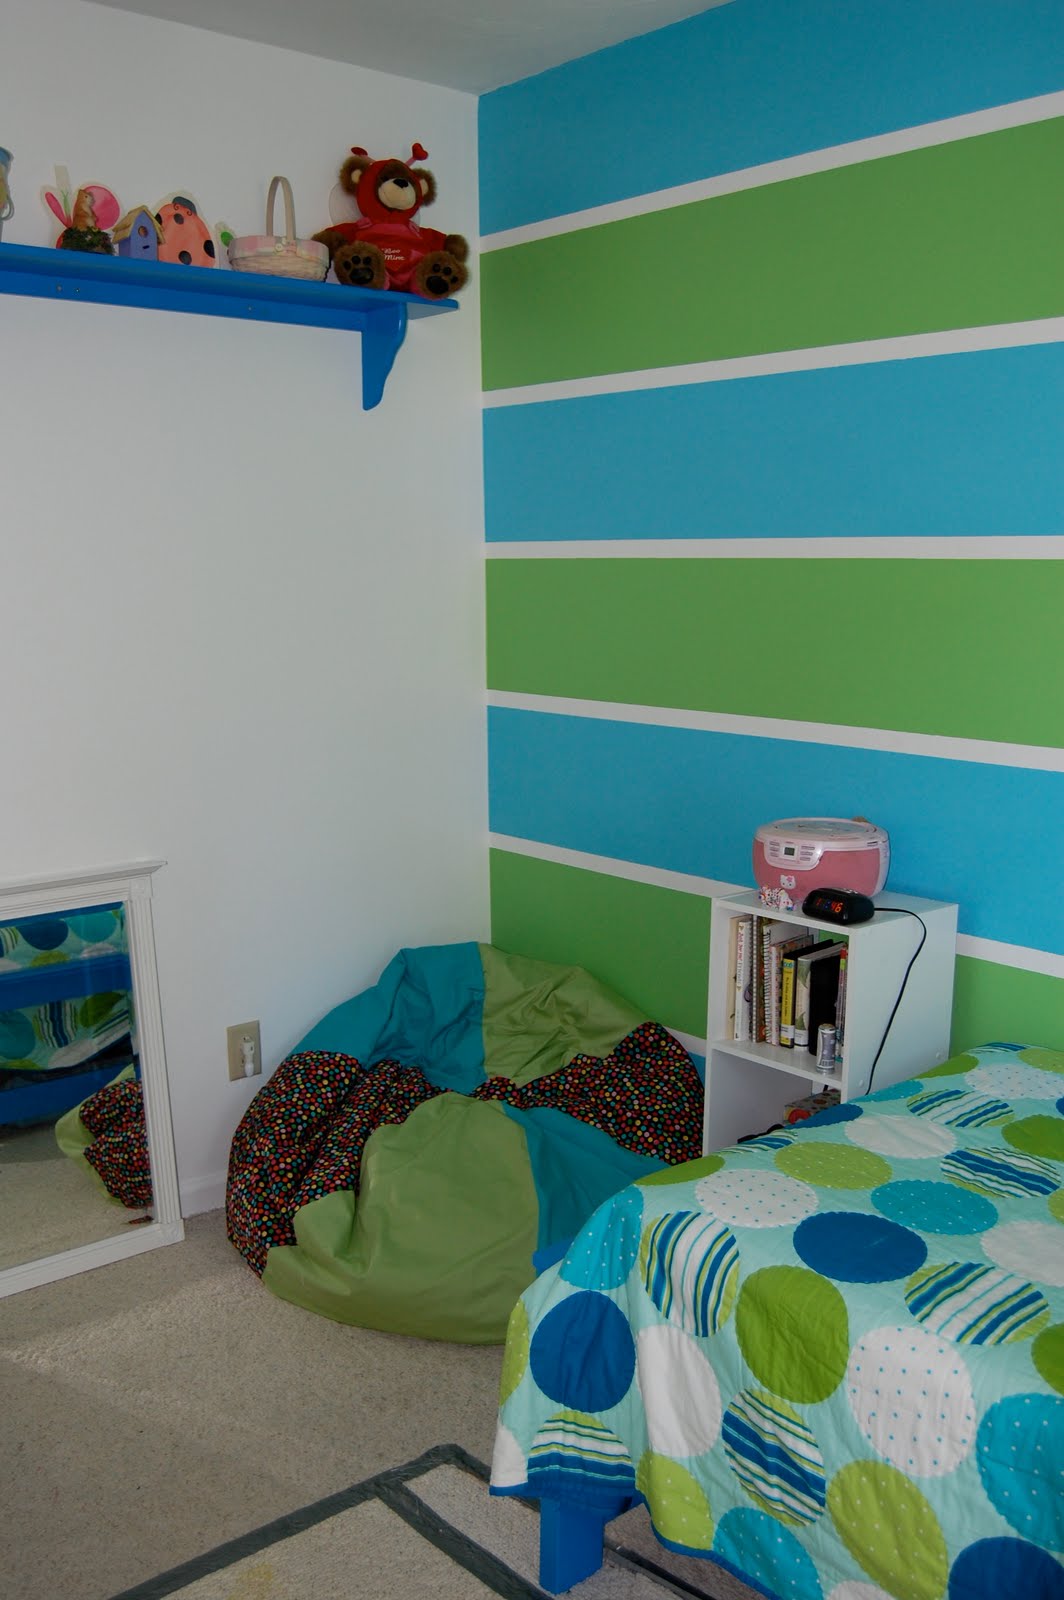
I really wanted to show you a clean and completed room, but "clean" just isn't in Regan's blood and I just have not been able to get it all done as quickly as I had wanted. So, for better or worse, this is how Regan's room looks right now. In case you've forgotten, this is what the room used to look like, but Regan decided about a year ago that she does NOT like pink!
When she was choosing her colors, she decided she liked the strips and wanted to keep them, so I re-taped the white and painted over with blue and green. That part was easy, but because the walls are textured it is impossible to not have some seepage of the colors under the tape. In case you are wondering, it took me about 3 hours with a teeny paint brush to touch up the white stripes.
 The curtains are the top sheet from her sheet set ($15 with coupon at Bed Bath and Beyond, not bad for 100% cotton curtains and sheets). I have not put top sheets on the kids beds for years because they just kick them down the the end of the bed and never use them! We found the quilt on clearance at Target yesterday and did not realize until we got home that some of the circles have the same green with white polka-dot pattern that her curtains and sheets do!
The built in book shelf used to be a dark stain, we decided to paint it white to help brighten up a dark room (only one window with a large tree just outside it) and I think it makes the room feel a bit bigger too. The closet curtain is a $3 Walmart sheet. Took me about 10 minutes to make a pocket for the tension curtain rod that holds it up. Oh, and the blank canvas (above the fan) will eventually have a USA map.
The ribbon I used on this lamp was the inspiration for the colors Regan chose.

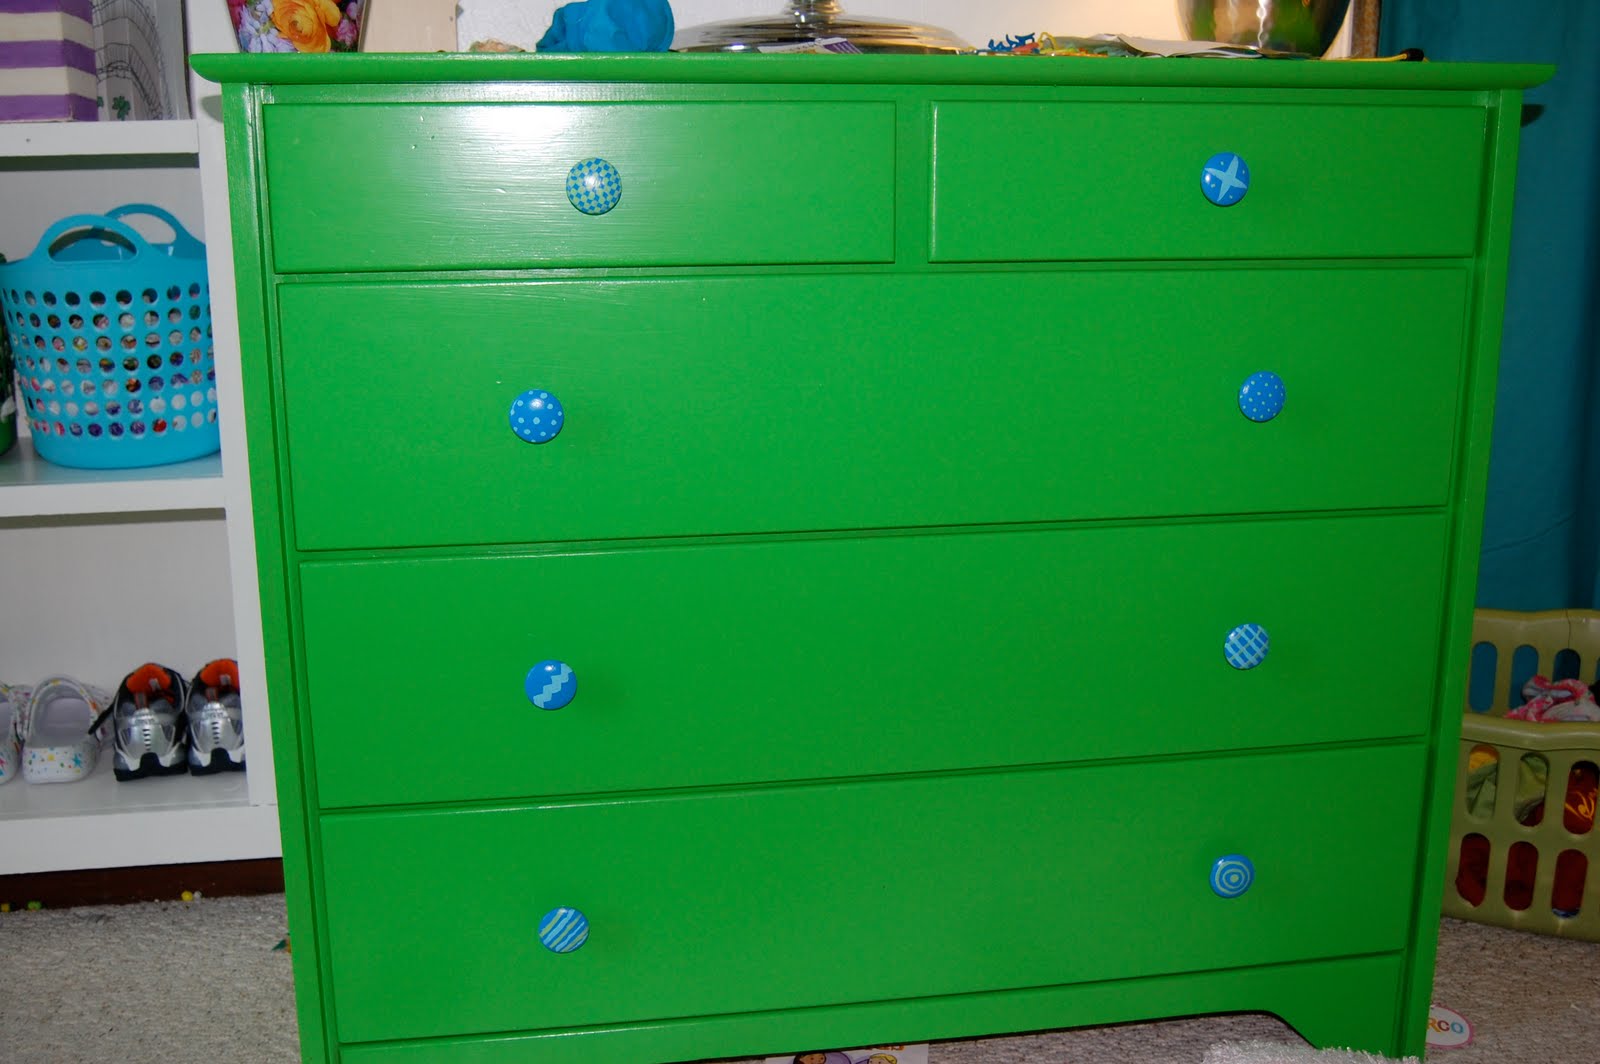
This dresser used to have a dark cherry stain, I sanded it down and painted it Caterpillar green (sorry dad!), yowzers that's bright, but I think it is Regan's favorite part of the make-over! We hand painted the knobs together with the colors of the wall and bed frame.

Eventually there will be a BIG bean bag chair in this corner (I just ordered the bean bag fill today)! And hopefully one of these days the room will be clean enough for me to do a real reveal with all projects complete and everything put back where it belongs!
 Next up? Painting over those flowers in the boys room!
When she was choosing her colors, she decided she liked the strips and wanted to keep them, so I re-taped the white and painted over with blue and green. That part was easy, but because the walls are textured it is impossible to not have some seepage of the colors under the tape. In case you are wondering, it took me about 3 hours with a teeny paint brush to touch up the white stripes.
 The curtains are the top sheet from her sheet set ($15 with coupon at Bed Bath and Beyond, not bad for 100% cotton curtains and sheets). I have not put top sheets on the kids beds for years because they just kick them down the the end of the bed and never use them! We found the quilt on clearance at Target yesterday and did not realize until we got home that some of the circles have the same green with white polka-dot pattern that her curtains and sheets do!
The built in book shelf used to be a dark stain, we decided to paint it white to help brighten up a dark room (only one window with a large tree just outside it) and I think it makes the room feel a bit bigger too. The closet curtain is a $3 Walmart sheet. Took me about 10 minutes to make a pocket for the tension curtain rod that holds it up. Oh, and the blank canvas (above the fan) will eventually have a USA map.

The ribbon I used on this lamp was the inspiration for the colors Regan chose.

This dresser used to have a dark cherry stain, I sanded it down and painted it Caterpillar green (sorry dad!), yowzers that's bright, but I think it is Regan's favorite part of the make-over! We hand painted the knobs together with the colors of the wall and bed frame.
Eventually there will be a BIG bean bag chair in this corner (I just ordered the bean bag fill today)! And hopefully one of these days the room will be clean enough for me to do a real reveal with all projects complete and everything put back where it belongs!
 Next up? Painting over those flowers in the boys room!
Friday, August 13, 2010
sewing for the baby
It's only taken me 6.5 months to make something for Addie! These are the Quick Change Trousers from Anna Maria Horner's newest book, Handmade Beginnings and I love them! Addie giggled every time I tried them on her too :) My favorite part is that since they are reversible it is like making two pairs of pants at once!
 I was tempted to add some ruffles to that cute bum, but then they wouldn't really be reversible, bummer (no pun intended).
I think she's finally warmed up to the camera.

Here is the reverse.

 These turned out so well I can't wait to try out some of the other patterns in the book, and I am sure there will be more Quick Change Trousers to come this fall!
Thursday, August 12, 2010
schoolroom week
Here is where we do school (and sew and craft and entertain guests and blog... you get the picture). I am so excited to finally have a table big enough for the whole family to work at and not be bumping elbows!

These maps are new too (if you turn it around the other side is a map of the USA). I got them at Office Max for $20 and spend another $7 on the wood (4 52" pieces of screen trim) I used double sticky tape to put the maps together and to hold the wood in place then used a staple gun to attach the wood then tied twine to the ends and hung!

And just so you can get a better fell for the space here are some more pictures of our "great room". This is the other side of the room.
 Those blue book cases hold all our school books, and yes, that is my wreath made of Christmas balls still hanging- I just liked it so much I did not want to take it down :)

If you zoom in on this one you will see my nativity is still out too- we celebrate Jesus' birth all year long around here.

Oh, I did some rearranging in the kitchen too. This chalk board used to hang where the maps are now.
 So, this is where we spend our days! Now go on over the heart of the matter to check out everyone else's schoolrooms at the Not Back to School Blog Hop!


These maps are new too (if you turn it around the other side is a map of the USA). I got them at Office Max for $20 and spend another $7 on the wood (4 52" pieces of screen trim) I used double sticky tape to put the maps together and to hold the wood in place then used a staple gun to attach the wood then tied twine to the ends and hung!

And just so you can get a better fell for the space here are some more pictures of our "great room". This is the other side of the room.
 Those blue book cases hold all our school books, and yes, that is my wreath made of Christmas balls still hanging- I just liked it so much I did not want to take it down :)
If you zoom in on this one you will see my nativity is still out too- we celebrate Jesus' birth all year long around here.

Oh, I did some rearranging in the kitchen too. This chalk board used to hang where the maps are now.
 So, this is where we spend our days! Now go on over the heart of the matter to check out everyone else's schoolrooms at the Not Back to School Blog Hop!
Tuesday, August 10, 2010
cheap art mini tutorial
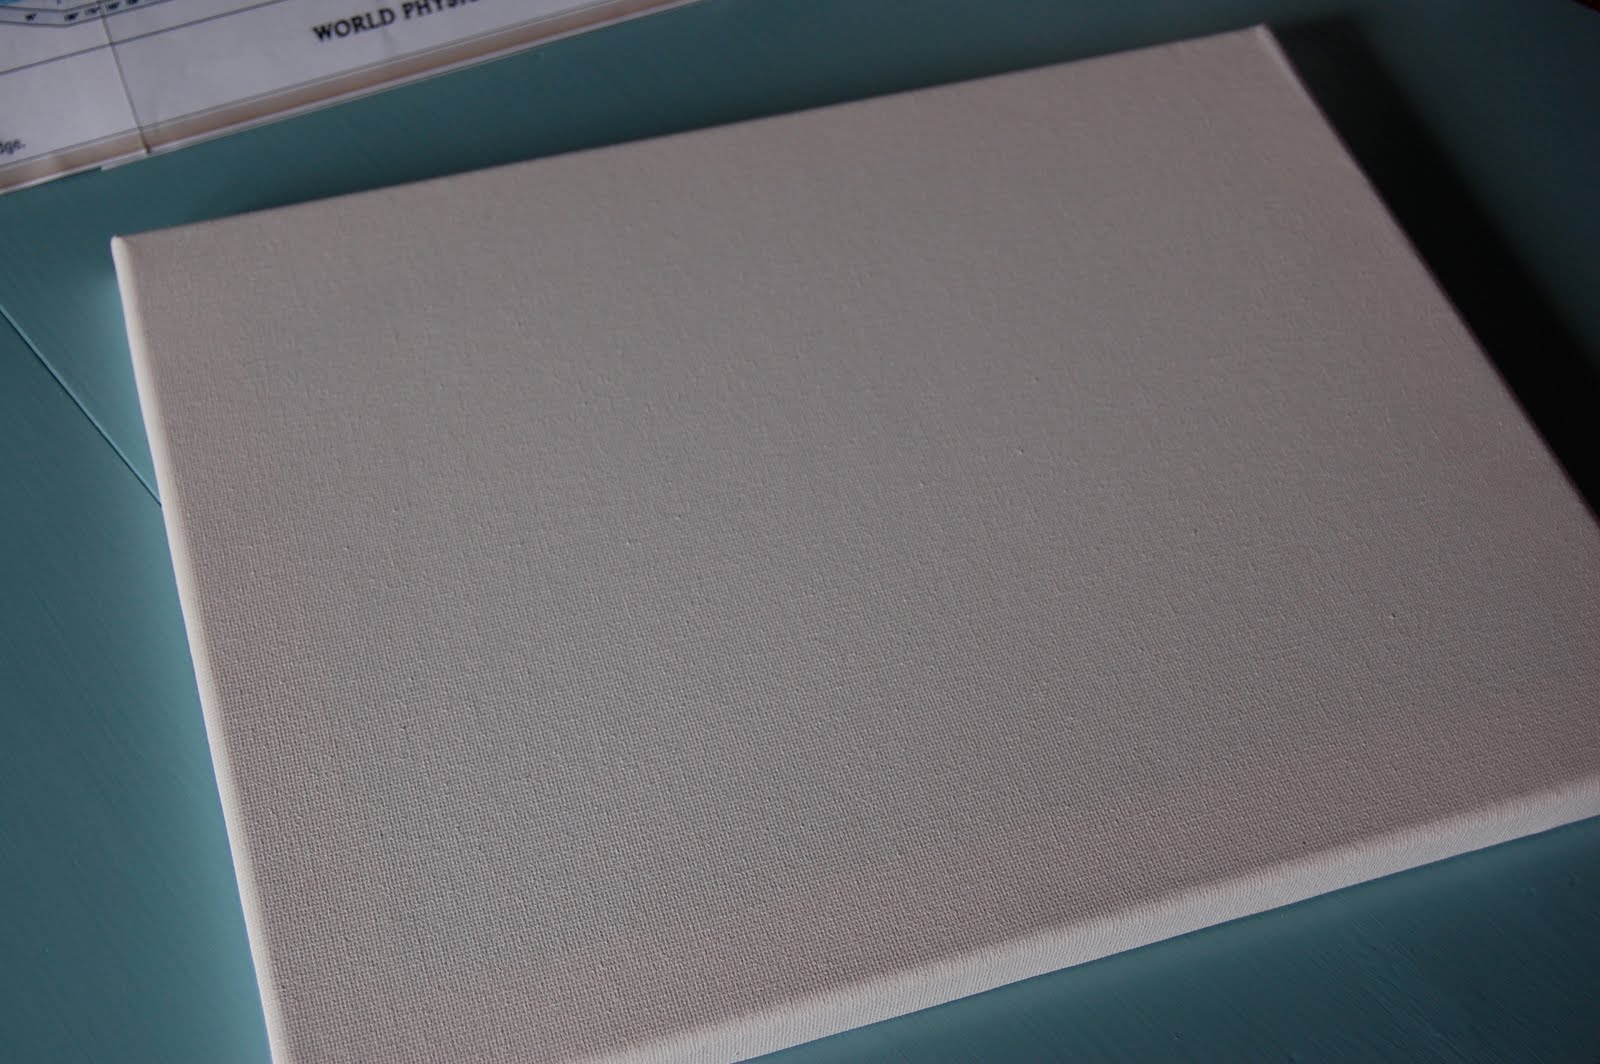
I've been working on some art canvases for Regan's room. At one point Regan had taken the globe in her room and we discovered the colors in the globe matched the colors we had painted her room perfectly. I had bought a pack of art canvases planning to paint them as accents for the room, but the globe got me thinking. I searched the house for some extra maps but came up blank so then I googled printable maps and eventually found these. I printed up a world map and a US map and got started...

I used a 11x14 canvas.

First cut the map out and tape together with double sticky tape. Then figure out your desired placement and crease the map at the edges of the canvas.

Use a light coat of Mod Podge to adhere the map to the canvas, wrapping the canvas, like you would a present and cutting off excess paper. (I use a foam brush for application)

This is what it looked like right after I attached the map- the great thing about Mod Podge is that when I dries it all flattens out nicely (unless you get a little too crazy and put on too much).

After it had dried completely I put another coat on top to seal and protect the map. I may go back and put another coat on, but I don't have to. I love how the Mod Podge makes the color of the map really pop!
 A couple of notes- don't be concerned when the map wrinkles up again when you apply the top coat- it will flatten again when it dries. Also, be careful with this layer as the Mod Podge does have a tendency to pick up the color and smear it if you are not careful and use too much MP or too many strokes.
One these day I will actually post pictures of Regan's room- I just want to get it as close to finished as possible :)

I used a 11x14 canvas.
First cut the map out and tape together with double sticky tape. Then figure out your desired placement and crease the map at the edges of the canvas.

Use a light coat of Mod Podge to adhere the map to the canvas, wrapping the canvas, like you would a present and cutting off excess paper. (I use a foam brush for application)

This is what it looked like right after I attached the map- the great thing about Mod Podge is that when I dries it all flattens out nicely (unless you get a little too crazy and put on too much).

After it had dried completely I put another coat on top to seal and protect the map. I may go back and put another coat on, but I don't have to. I love how the Mod Podge makes the color of the map really pop!
 A couple of notes- don't be concerned when the map wrinkles up again when you apply the top coat- it will flatten again when it dries. Also, be careful with this layer as the Mod Podge does have a tendency to pick up the color and smear it if you are not careful and use too much MP or too many strokes.
 One these day I will actually post pictures of Regan's room- I just want to get it as close to finished as possible :)
Friday, August 6, 2010
not back to school
It's Not Back to School Month over at heart of the matter, and this week is curriculum week. I've already shared what we are doing this year in this post.
I am working on our "schoolroom", so this is good motivation to get it done for next weeks show and tell :)
Thursday, August 5, 2010
my very own dining room table!
I have been wanting a dining room table since we moved into this house 5 years ago (we never had a dining room before moving here) but it just has not been in the budget. Recently I have been looking on Craig's List hoping to find my dream table at a dream price. I did find the perfect table, but not for that dream price I was hoping for. I decided to make an (absurdly low) offer anyway and in the mean time kept checking other listings. I never even got a response from the "dream table" listing, but I did find this table.
 I know, pretty sad looking, BUT it was only $15 and had potential- I mean, it was wood and had two leaves (I really wanted a table with leaves for when we have guests).

It needed a bit of TLC and creative repair, but i was up for it.

See, looking better already :)
 Phil had suggested painting it Black or dark brown and since I was headed to Home Depot the next day to buy paint for Regan's room I figured I would pick up a quart for the table too... but after further thought I decided to shopping the shed first to see what paint we had that might work for the table. I was happy to find half a gallon of robin's egg blue in semi gloss just waiting to be used!
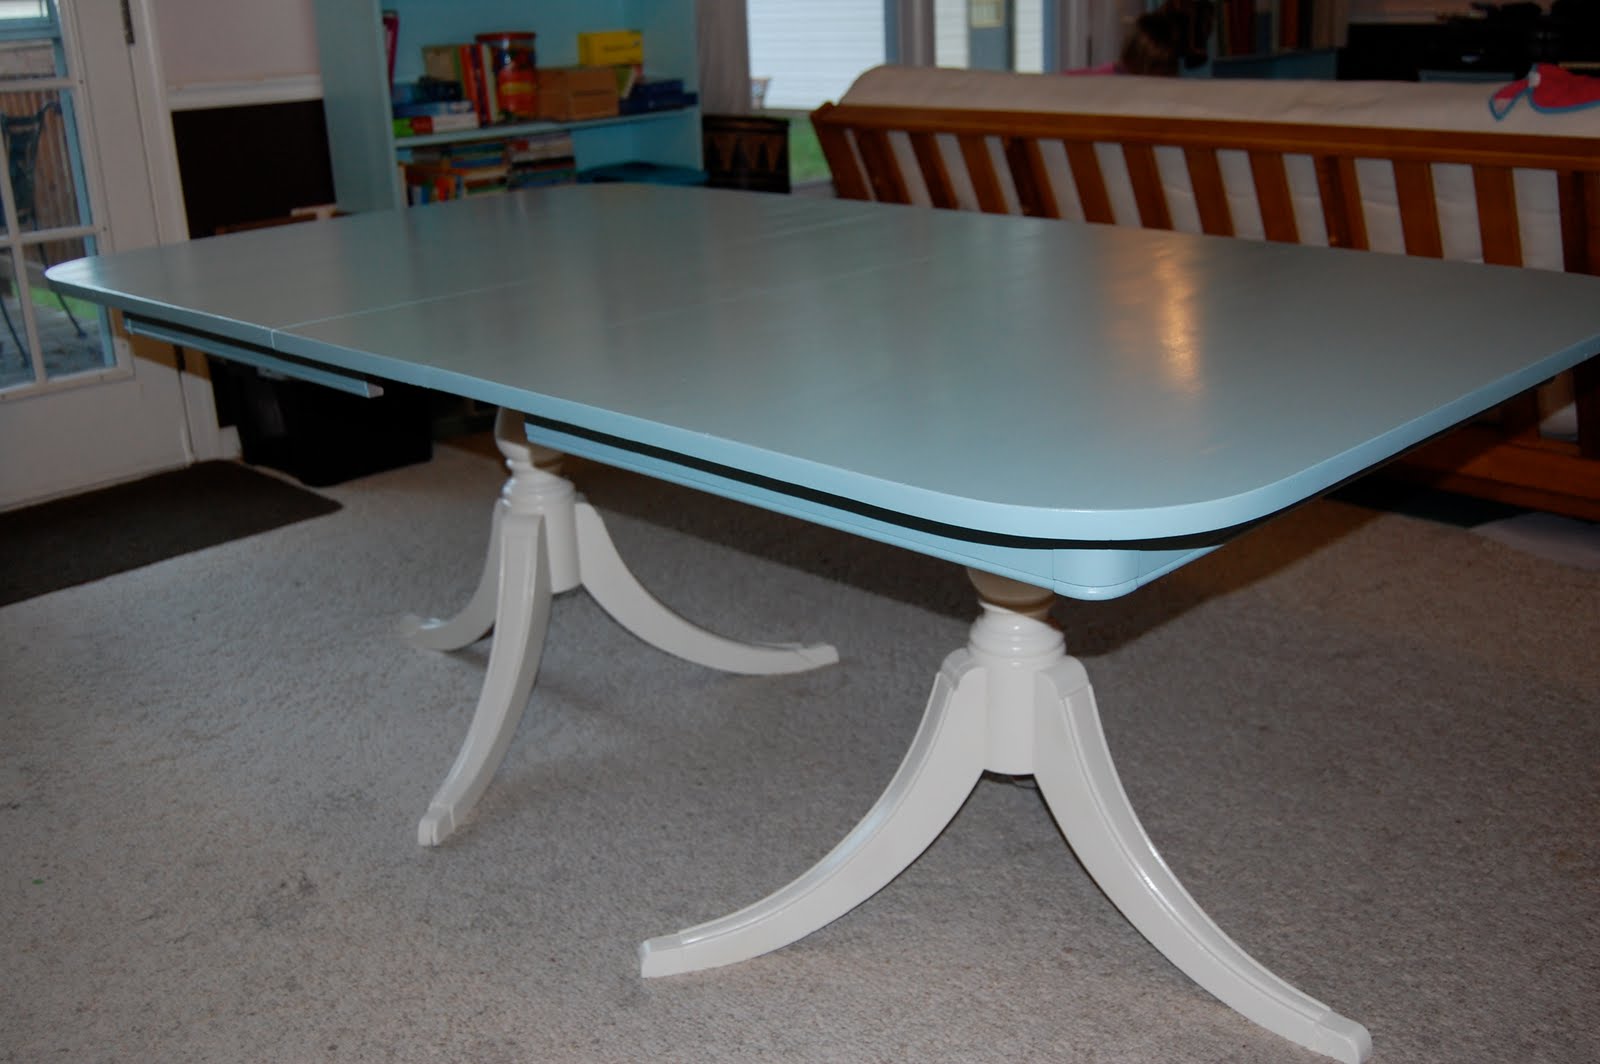
 So, I used a combo of Kilz and Zinsser spray primers that I had on hand (Phil did have to pick up one more can of Kilz as the two partially used cans I had were not quite enough). Then I brushed on two coats of the blue (Behr semi-gloss). After this I did one coat of Behr clear varnish I had on hand, but it was a matte finish and I was not happy with the look and feel, so the next day I sanded it down, did one more coat of blue and then one coat of Minwax water based Polycrylic Protective Finish in semi gloss (I just happened to have an unopened quart of this in the shed) and I LOVE the way it turned out!

I used Behr's Linen (semi-gloss) on the legs. I am still not sure if I like the legs lighter, but I will live with it awhile before I decide to paint again :)

Here the table is with both leaves in- big enough to sit 10 people comfortably!
 For just under $20 ($15 for table and $4.66 for spray primer) I have a nice BIG, sturdy dining room table!
A note on choosing paint:
So, I have read a few post recently of people praising Behr's new paint with primer for painting furniture, so this weekend I put it to the test. I painted Regan's dresser using the new paint with primer and this table with regular Behr semi-gloss. Hands down the regular semi-gloss went on smoother and easier and dried MUCH faster. It took just as many coats to cover with the paint with primer as with the regular paint and three days later the dresser is still tacky- the table is dry (and has been since about 4 hrs after painting the last coat).
I have been happy with the coverage of the paint with primer on the walls (and knowing my propensity towards bold colors that are hard to cover, will continue using it on our walls) but for future furniture painting I will stick to spray primer and regular old semi-gloss.
 I know, pretty sad looking, BUT it was only $15 and had potential- I mean, it was wood and had two leaves (I really wanted a table with leaves for when we have guests).
It needed a bit of TLC and creative repair, but i was up for it.

See, looking better already :)
 Phil had suggested painting it Black or dark brown and since I was headed to Home Depot the next day to buy paint for Regan's room I figured I would pick up a quart for the table too... but after further thought I decided to shopping the shed first to see what paint we had that might work for the table. I was happy to find half a gallon of robin's egg blue in semi gloss just waiting to be used!
 So, I used a combo of Kilz and Zinsser spray primers that I had on hand (Phil did have to pick up one more can of Kilz as the two partially used cans I had were not quite enough). Then I brushed on two coats of the blue (Behr semi-gloss). After this I did one coat of Behr clear varnish I had on hand, but it was a matte finish and I was not happy with the look and feel, so the next day I sanded it down, did one more coat of blue and then one coat of Minwax water based Polycrylic Protective Finish in semi gloss (I just happened to have an unopened quart of this in the shed) and I LOVE the way it turned out!
I used Behr's Linen (semi-gloss) on the legs. I am still not sure if I like the legs lighter, but I will live with it awhile before I decide to paint again :)

Here the table is with both leaves in- big enough to sit 10 people comfortably!
 For just under $20 ($15 for table and $4.66 for spray primer) I have a nice BIG, sturdy dining room table!
 A note on choosing paint:
So, I have read a few post recently of people praising Behr's new paint with primer for painting furniture, so this weekend I put it to the test. I painted Regan's dresser using the new paint with primer and this table with regular Behr semi-gloss. Hands down the regular semi-gloss went on smoother and easier and dried MUCH faster. It took just as many coats to cover with the paint with primer as with the regular paint and three days later the dresser is still tacky- the table is dry (and has been since about 4 hrs after painting the last coat).
I have been happy with the coverage of the paint with primer on the walls (and knowing my propensity towards bold colors that are hard to cover, will continue using it on our walls) but for future furniture painting I will stick to spray primer and regular old semi-gloss.
Subscribe to:
Posts (Atom)

